
What Should You Know Before Buying Your First Paint Sprayer?
First-time buyers grab whatever sprayer looks good on the shelf; then they spend the next weekend covered in overspray, wondering what went wrong. A paint sprayer is a real commitment. The gap between a good result and a ruined surface often comes down to decisions made before you ever pull the trigger.
This guide breaks down the most important factors every beginner should understand before spending money, from sprayer types to safety gear to realistic cleanup expectations. Here are the five things that matter most.
Sprayer Type Determines Everything
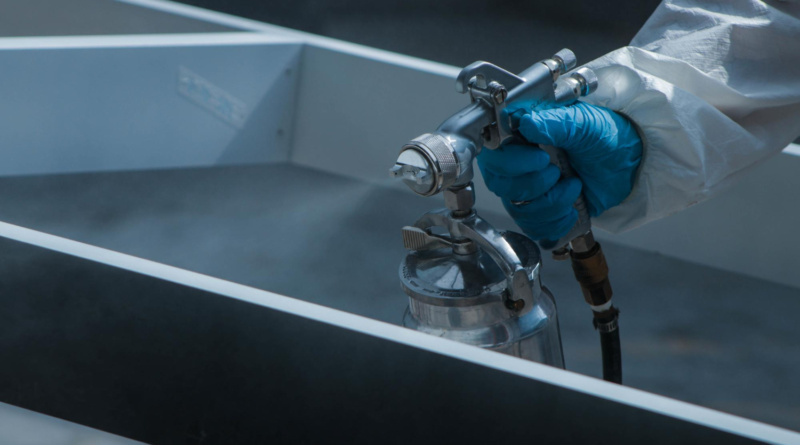
Pick a sprayer category, and you’ve basically picked everything else: the coatings you can spray, the finish quality you get, and the cleanup time you’ll face. A professional paint sprayer in the HVLP (High Volume Low Pressure) category atomizes paint at lower pressure and produces a finer finish with less overspray than airless models do; that’s why HVLP wins for furniture, cabinets, and trim work where precision counts.
Airless sprayers push paint at high pressure and cover large surfaces fast. They’re built for exterior walls, fences, and decks rather than detail work. Then there are compressed air sprayers, which deliver excellent atomization but require a separate air compressor, which adds cost and bulk. Honestly, the trick is to figure out what surfaces you plan to paint most often, then let that answer dictate your choice. An airless sprayer for cabinet refinishing, or an HVLP unit for a two-story exterior? You’ll regret it.
Viscosity and Paint Compatibility Are Not Optional Reading
Every sprayer has a viscosity range it can handle. Ignoring that spec is one of the fastest ways to clog a tip or produce an uneven finish. Viscosity measures how thick your paint or coating is. Latex paints, oil-based enamels, lacquers, and stains all sit at different thicknesses, not every sprayer handles them without thinning.
Most HVLP sprayers need paint thinned by 10 to 20 percent for smooth atomization. Airless models generally handle thicker coatings straight from the can. And here’s where it matters: before you buy, check the manufacturer’s viscosity rating and compare it against the coatings you actually plan to use. A viscosity cup is cheap, measures flow rate in seconds, and most sprayer brands publish the target range in their documentation. Your coating doesn’t fall in that range? You either thin it or you pick a different sprayer. There’s no workaround that produces good results without addressing viscosity first.
Spray Pattern, Tip Size, and Pressure Settings
These three controls work together. Beginners almost always underestimate how much adjustment they require. The spray pattern refers to the shape of the spray fan: horizontal, vertical, or circular. Most projects call for a vertical fan for horizontal surfaces and a horizontal fan for vertical ones.
Tip size, measured in thousandths of an inch, controls how much material flows out per pass. A 0.011 tip suits thin stains and lacquers. A 0.017 tip handles standard latex paint. A 0.021 tip or larger moves heavier coatings like elastomeric paint. Pressure settings fine-tune atomization: too low and you get an orange-peel texture; too high and you waste material through overspray. Start at the lowest pressure that fully atomizes your coating. Do a test pass on cardboard before touching your actual surface; that 10-minute test will save you hours of correction.
Overspray, Masking, and Your Work Environment
Overspray is the mist of atomized paint that doesn’t land where you aimed it. Every sprayer produces some. The difference is in how much, and that depends on your sprayer type, pressure settings, and distance from the surface. HVLP units produce less overspray than airless models at equivalent coverage rates, so they’re preferred for indoor work.
Your work environment matters as much as the sprayer itself. Spray outdoors whenever you can, but account for wind; even a light breeze redirects overspray onto surfaces you didn’t intend to coat. Indoors, lay drop cloths on every surface within six to eight feet of your work area. Tape off hardware, glass, and adjacent trim with painter’s tape before you start. Good masking takes time. It’s far faster than scraping dried paint off a window frame. Wear a respirator rated for organic vapors, not just a dust mask. Fine atomized particles stay airborne longer than brush-applied coatings and travel deeper into your lungs.
Cleanup Is Part of the Job
Most first-time sprayer owners don’t factor cleanup into their time estimate. That’s a mistake. A brush or roller rinses out in a few minutes. A paint sprayer has a fluid needle, nozzle, tip guard, cup, and multiple O-rings; all need to be flushed and cleaned after every single use.
Solvent-based coatings require mineral spirits or lacquer thinner for cleanup. Water-based coatings rinse with warm water, but you still need to disassemble the tip assembly and scrub it. If paint dries inside the nozzle or tip, you risk a clogged sprayer that takes hours to restore or that you simply replace. Build 20 to 30 minutes of cleanup time into every session. Store the sprayer with the fluid passages flushed; if it’ll sit for more than a week, run a small amount of appropriate solvent through the system to prevent residue buildup. Treat cleanup as part of the project, not an afterthought, and your sprayer will last for years.
Conclusion
The question of what you should know before buying your first paint sprayer always comes back to fit: the right sprayer type for the right surface, with the right tip, the right coating viscosity, and the right preparation. Buy for the project you actually have, not some theoretical broadest possible use case. Understand overspray. Master your settings on scrap material first. Respect the cleanup process. Do those things, and your first sprayer becomes a tool you’ll keep reaching for rather than one that ends up gathering dust on a shelf.